Step by Step: How to Solder
Read Carefully
This page contains the most important information in this book. If there's one page to read carefully, it's this one.Now it's time to actually start soldering!
Step 1: Clean and Tin Your Tip
In order to get a proper bond, both the component lead and the PCB pad need to be heated, and the only good way to transfer the heat is with a well-tinned soldering iron tip that's wet with solder.
So take a moment now to clean and tin your tip again, and add a bit more solder.
Step 2: Heat Joint
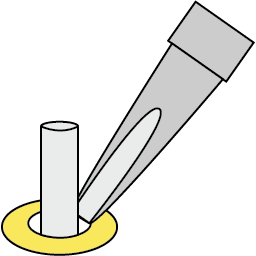
Touch the pad and resistor: Press the tip against the resistor lead and the pad on the PCB. Use a bit of pressure, but don't strain yourself. If you find the PCB moves too easily, look for something to secure it. I like to use blue putty, but get creative and use whatever you can find.
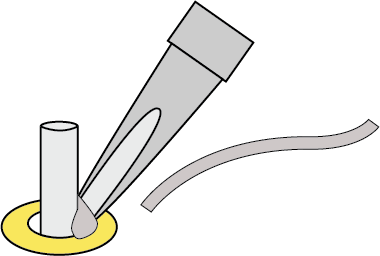
Transfer heat: Add a bit of solder between the tip and the component if it's not already fairly wet. This little bit of solder will act as a bridge to let the heat flow from the iron's tip to the pad and the component.
TIME CHECK
At this point no more than 1-2 seconds should have passed with heat applied. If it's been longer, remove the iron and let the PCB and resistor cool. Take this opportunity to clean and tin your tip againStep 3: Apply Solder
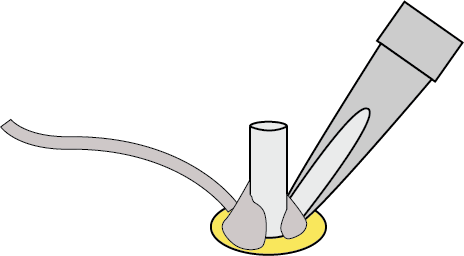
Start adding solder from the other side. The component's lead and the pad should be melting the solder, NOT your iron's tip.
If you feel any resistance, or the solder isn't being pulled across the pad and up lead, it's not hot enough. Reassess and make sure you have wet solder on the tip, and that it's touching both the pad and the component. If so, let it heat for up to 1 or 2 more seconds to see if the resistance disappears. Otherwise try cleaning your tip, tinning it again, then going back to the first step.
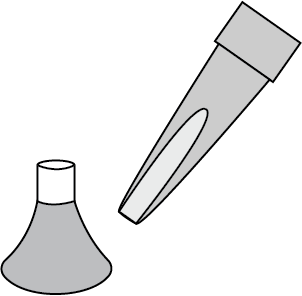
If there's no resistance and the solder is flowing, keep pushing solder into the joint until you have a concave mountain as shown here. Notice how the solder has completely covered the pad and has been drawn up the lead.
TIME CHECK
2-4 seconds should have passed since you first applied heat.If you're taking longer than 4 seconds, STOP. Let the solder and component cool, then reapply heat and finish your joint
Step 4: Cool and Check
Don't let anything move while the solder joint cools (3-6 seconds).
If the resistor's lead moves while it's cooling, the solder won't properly bond to it and you'll have what's called a "disturbed" or "cold joint" that doesn't conduct electricity properly. Luckily this is easily fixed by reheating the solder and "reflowing" the joint.
To check your joint, first make sure it has a concave mountain shape. It should be smooth and relatively shiny. If it's not, try reheating the joint to reflow it.
Look at the other side of the board and you should see a little bit of solder coming through the hole. If you don't, you may not have enough solder. Heat up the joint and push a bit more solder into it.
Step 5: Clean and Tin Your Tip (again!)
Clean and tin the tip again before you set it down. If you're going to be leaving your soldering iron for a while, add extra solder to the tip to keep it protected from oxidation.


